
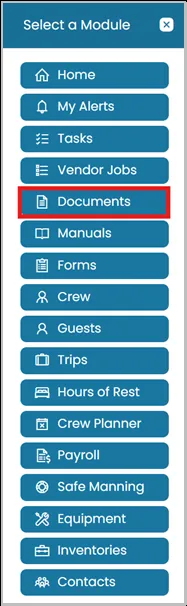
- Click Modules icon and select Documents.
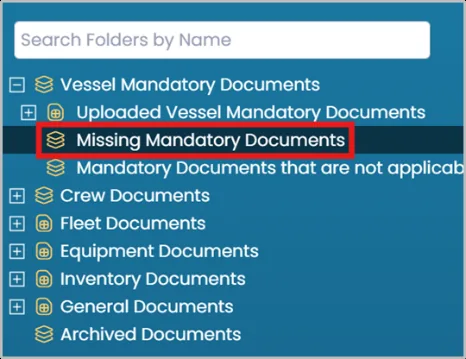
- In the folder structure on the left-hand side, choose Missing Mandatory Documents.
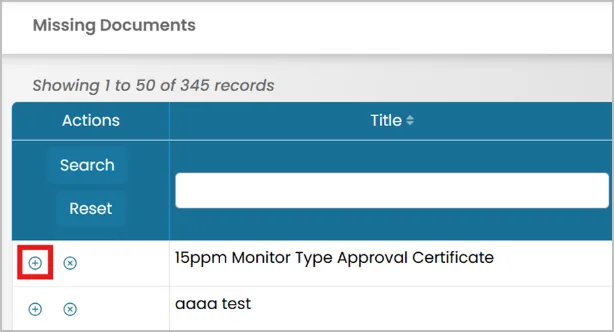
- Click the Add icon to upload a file.
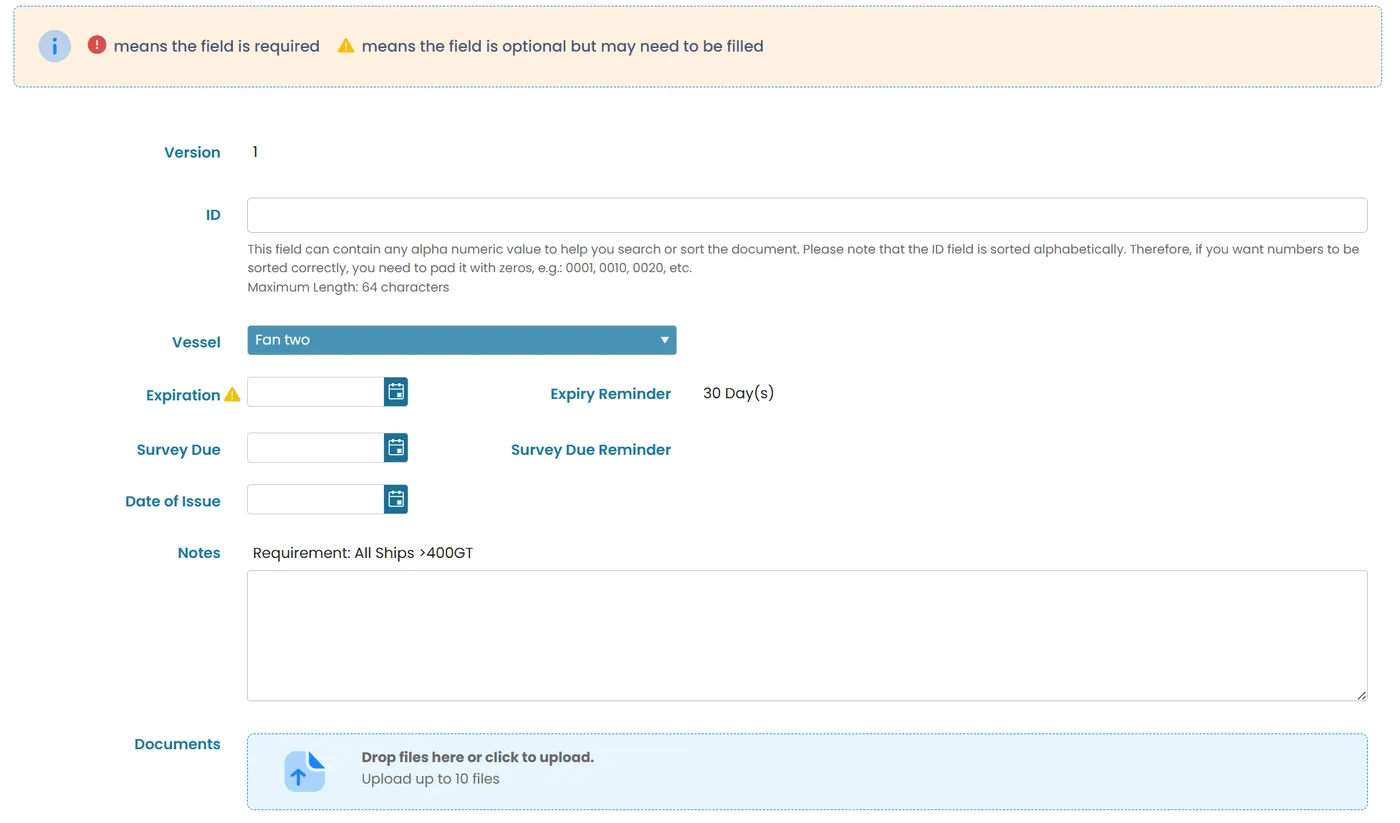
- Enter all the required information for the document you are uploading.
- Version shows the current version number of the document.
- ID is an optional reference code you can use to search or sort documents.
- Vessel lets you pick which vessel the document belongs to.
- Expiration is the date the document expires, if it has one.
- Expiry Reminder shows how many days before expiration you'll get a reminder.
- Survey Due is the date the next survey is due, if applicable.
- Date of Issue is when the document was originally issued.
- Notes is a free-text field for any extra details about the document.
- Documents are where you upload the actual file (up to 10 files, by drag-and-drop or click to browse).
- After filling in the document details, you may now click Publish or Publish and Verify.
- Publish — Saves the document record as-is, without marking it as verified.
- Publish and Verify — Saves the document and marks it as verified in one step. This button only appears if you have permission to verify documents; if you don't have that permission, you'll only see the Publish option.

Was this article helpful?
Still need help?
Our support team will pick it up as a support ticket and reply by email.