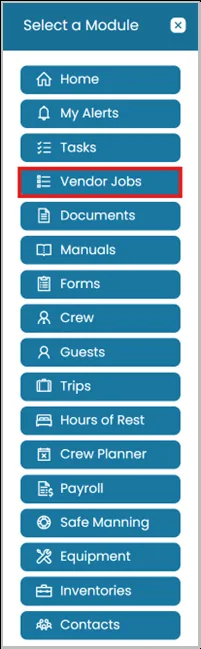
- Click the Modules icon and select Vendor Jobs.
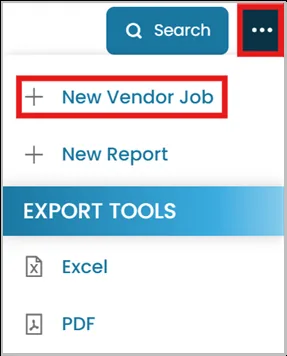
- In the top right corner, click the three dots and select the New Vendor Job.
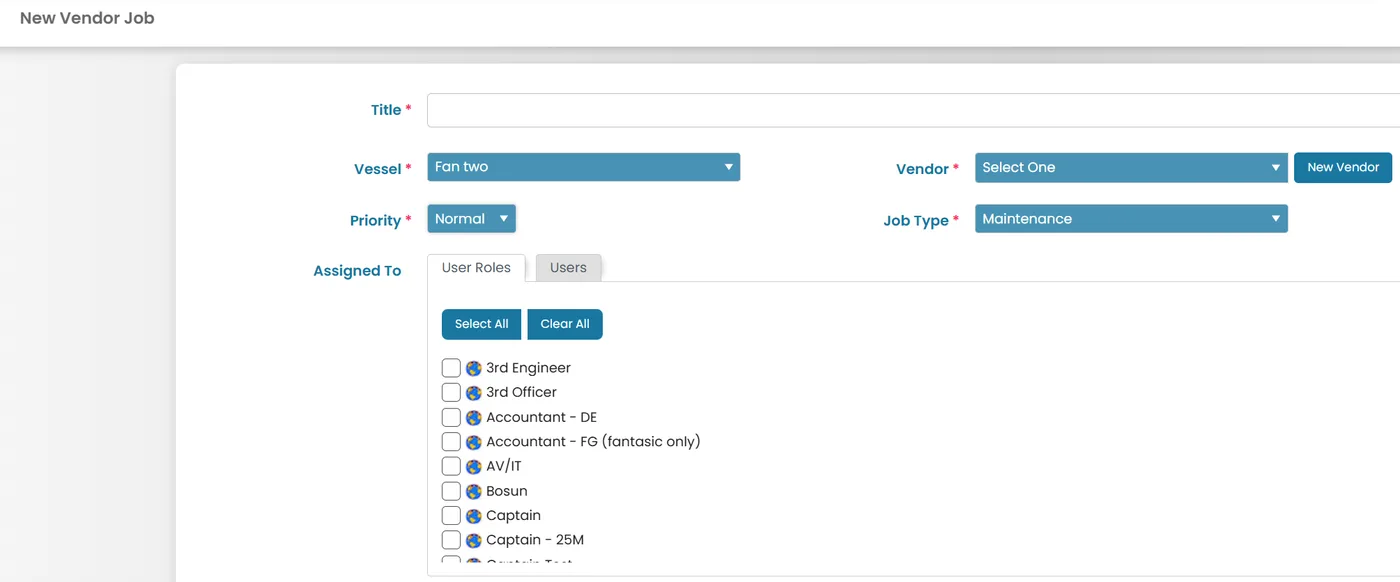
- Enter a title for the vendor job, select the vessel, and choose the vendor from the list. If the vendor does not already exist, click New Vendor to create one.
Then, select the priority, job type, and assign the job to the appropriate user or user role responsible for completing it.
- Complete the remaining vendor job details as required:
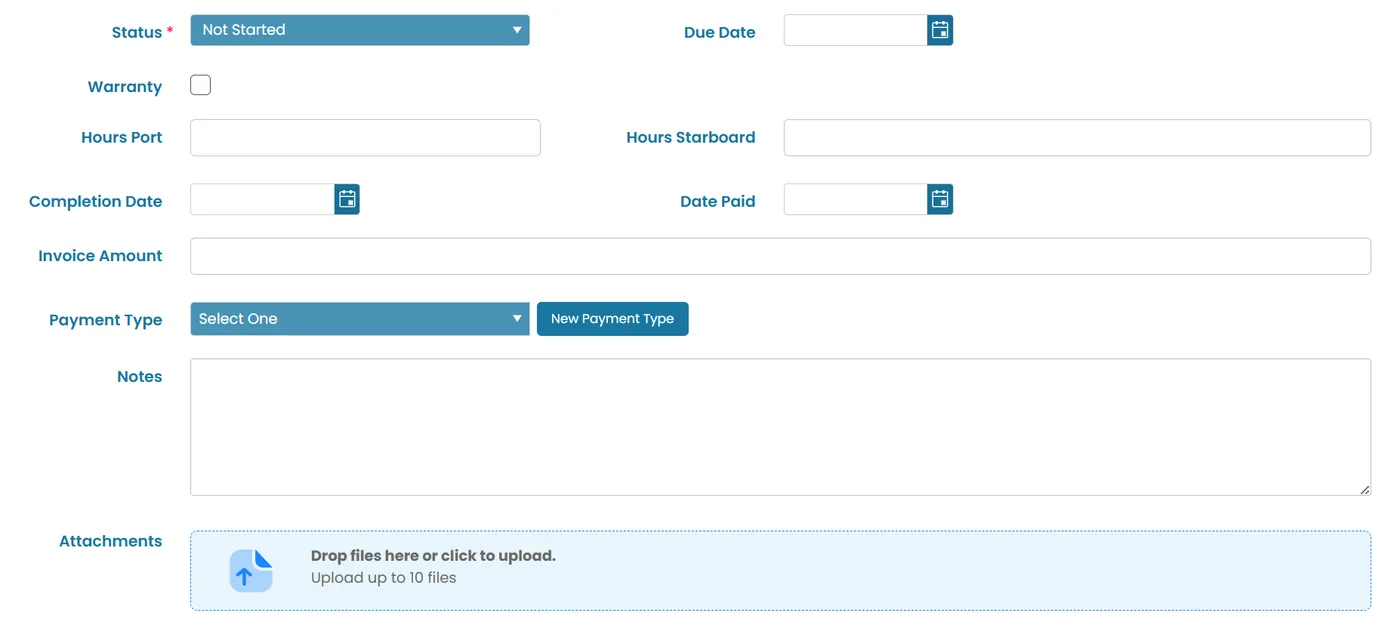
- Select the Status of the job (e.g., Not Started, In Progress, or Completed).
- Enter the Due Date for when the work should be completed.
- Tick Warranty if the work is covered under warranty.
- Enter the Port and Starboard Hours, if applicable, to record equipment or engine hours at the time of the job.
- If the job has been completed, enter the Completion Date.
- Enter the Invoice Amount and, once payment has been made, specify the Date Paid.
- Select the appropriate Payment Type or click New Payment Type to create a new payment method if required.
- Add any additional information in the Notes field.
- Upload any relevant Attachments, such as invoices, quotations, photos, or supporting documents, to keep all job-related information in one place.
- Once all required information is entered, click Submit or Submit and Create Task.
- When you choose Submit and Create Task, you’ll be directed to the task page where you can input details to complete the vendor job.
- The task will be linked to the vendor job, showing related information like equipment or inventory.
- Once done, click Submit or Submit and Create Task Due Automation.
- Clicking Submit will only create the task.

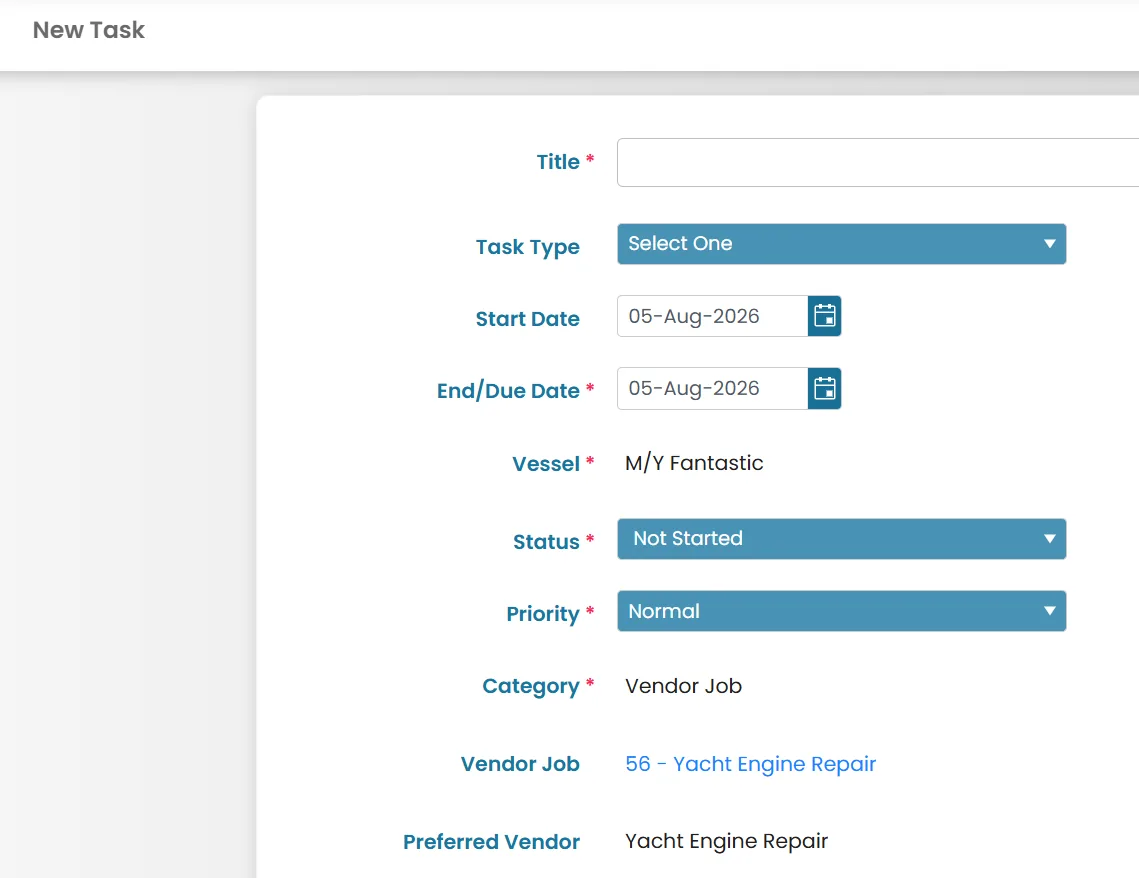

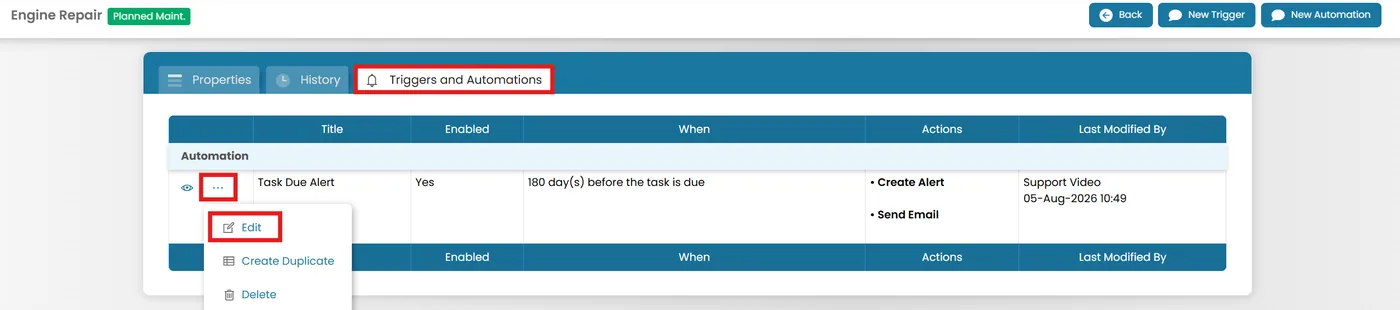
If you select Submit and Create Task Due Automation, the task will be created along with an automated alert.
This option also allows you to edit the task details and set up the required automation settings.
Was this article helpful?
Still need help?
Our support team will pick it up as a support ticket and reply by email.